Create your TimeLodge account, name your workspace, and reach the dashboard ready to add your first client.
Before you begin
- Sign out of any TimeLodge account already open in your browser.
- Use an email address you can open if TimeLodge asks you to verify it.
- Have a unique password ready. A password manager can create and save one for you.
Roles and permissions
You can open registration while signed out. When you register, TimeLodge makes you the Owner of your personal workspace. As the owner, you can choose the setup route and save the workspace details in this guide.
Steps
Create your account
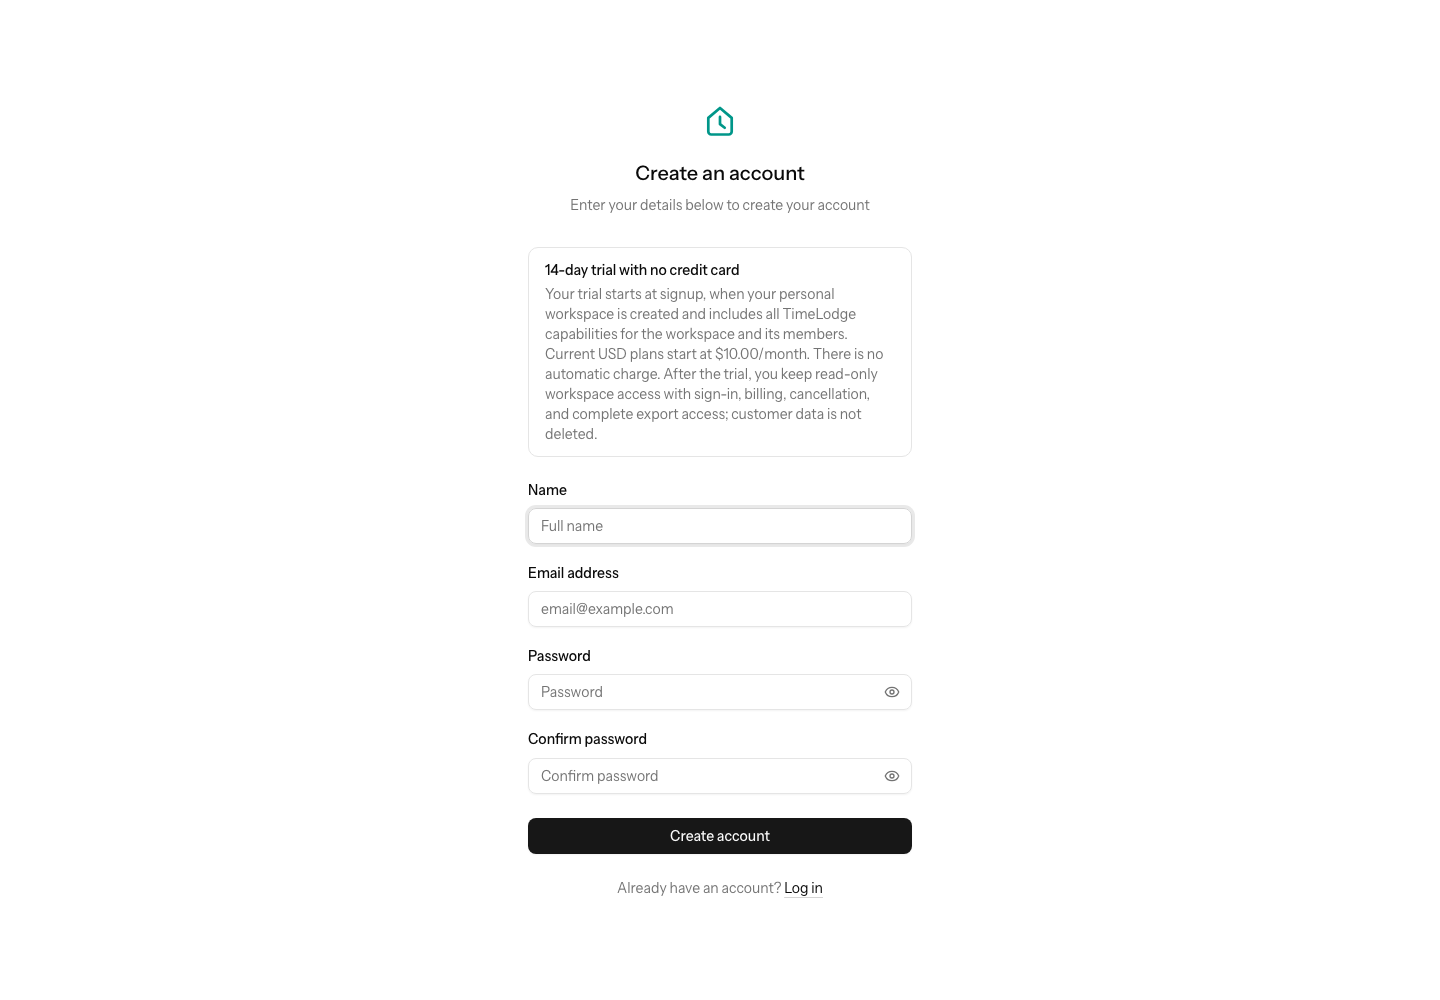
- Open the registration page and confirm the heading Create an account.
- Enter your full name in Name. TimeLodge uses it on your account.
- Enter your sign-in address in Email address. TimeLodge also uses it for verification when required.
- Enter a unique value in Password that meets the accepted password rules.
- Enter the same value in Confirm password.
- Select Create account. TimeLodge creates a personal workspace from your name and opens setup.
If TimeLodge shows Email verification, open the newest verification email in this browser. The page checks your status and continues automatically after verification. If this page does not appear, your address was confirmed automatically and setup opens immediately.
Choose how to begin
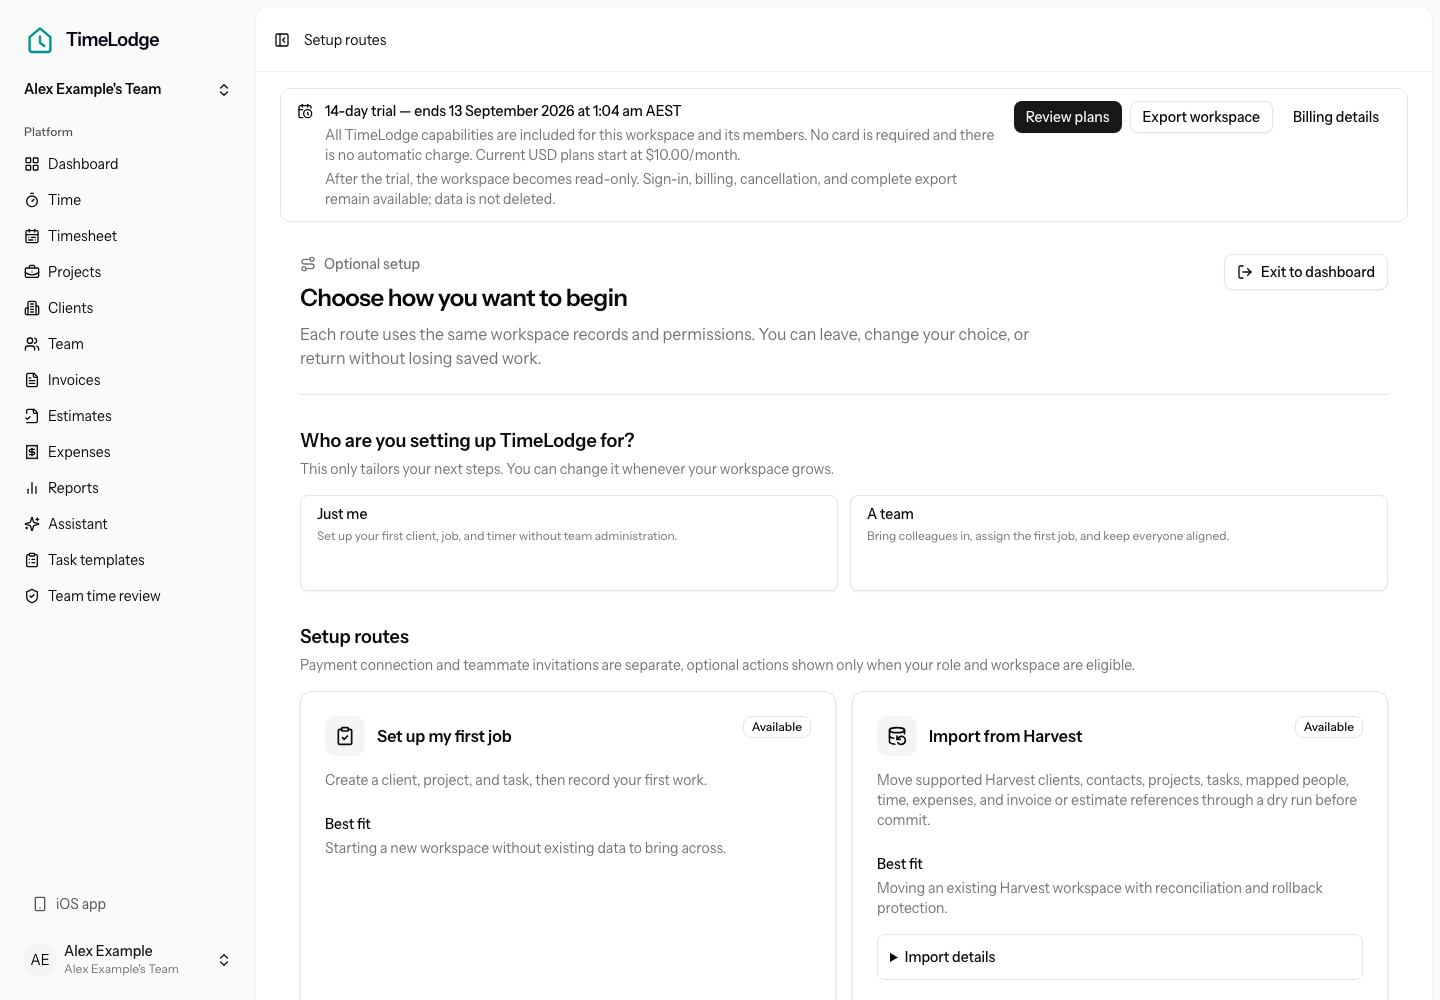
- Select Just me for a solo workspace or A team when you plan to invite colleagues.
- Select Start first job setup under Set up my first job to follow this sample journey.
You can instead choose Import from Harvest or Explore first. Those choices open different first actions and do not change your role.
Name and check your workspace
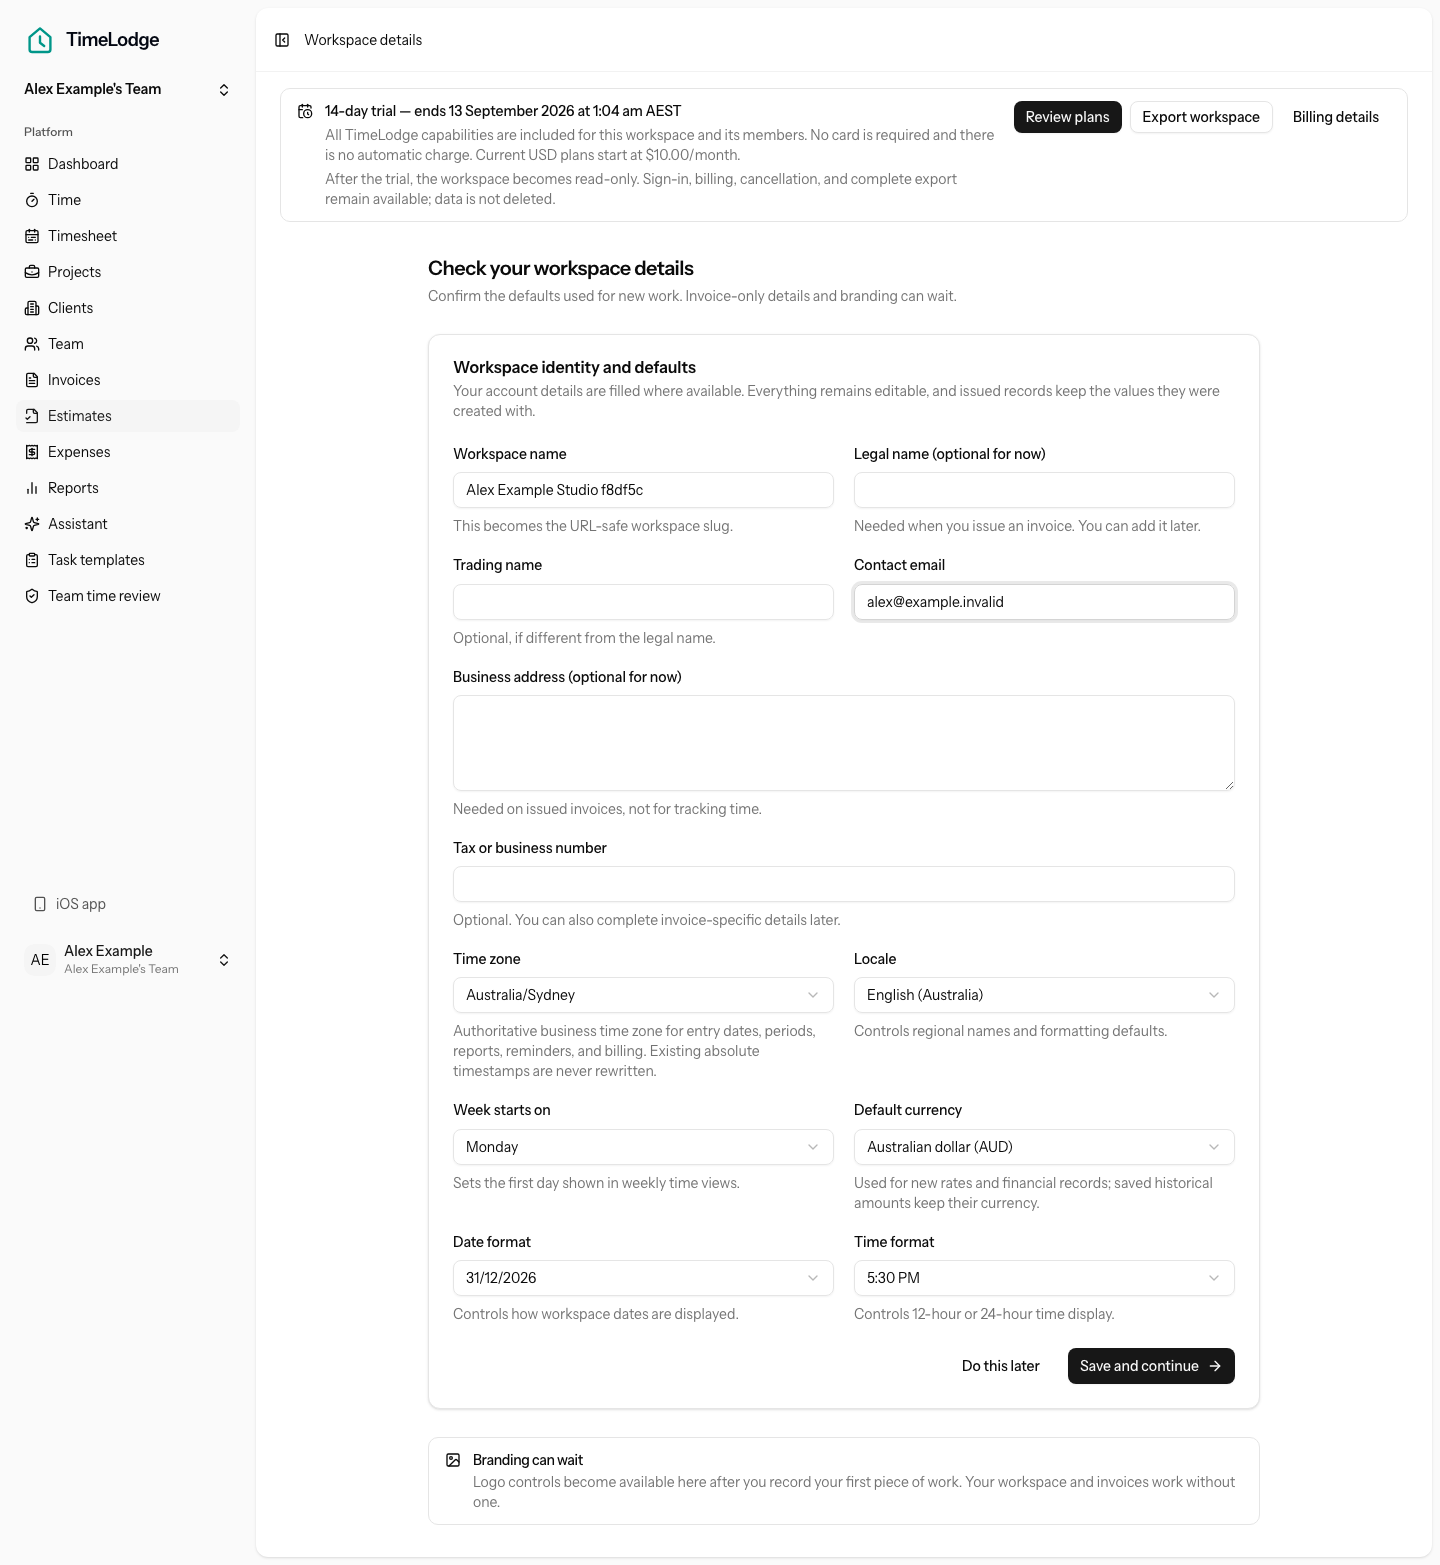
- Enter the business name you want people to recognise in Workspace name. TimeLodge also derives the workspace URL from it.
- Check Contact email. TimeLodge uses it as the workspace's business contact address.
- Check Time zone. It controls dates used for tracked work and reports.
- Check Locale. It controls regional names and formatting defaults.
- Choose the first day of your work week in Week starts on.
- Choose the currency for new rates and financial records in Default currency.
- Choose how workspace dates appear in Date format.
- Choose 12-hour or 24-hour display in Time format.
You can leave these invoice details empty during initial setup:
- Legal name (optional for now) is needed before you issue an invoice.
- Trading name is useful when it differs from your legal name.
- Business address (optional for now) is needed on issued invoices.
- Tax or business number can also be added later.
- Select Save and continue.
Reach your first action
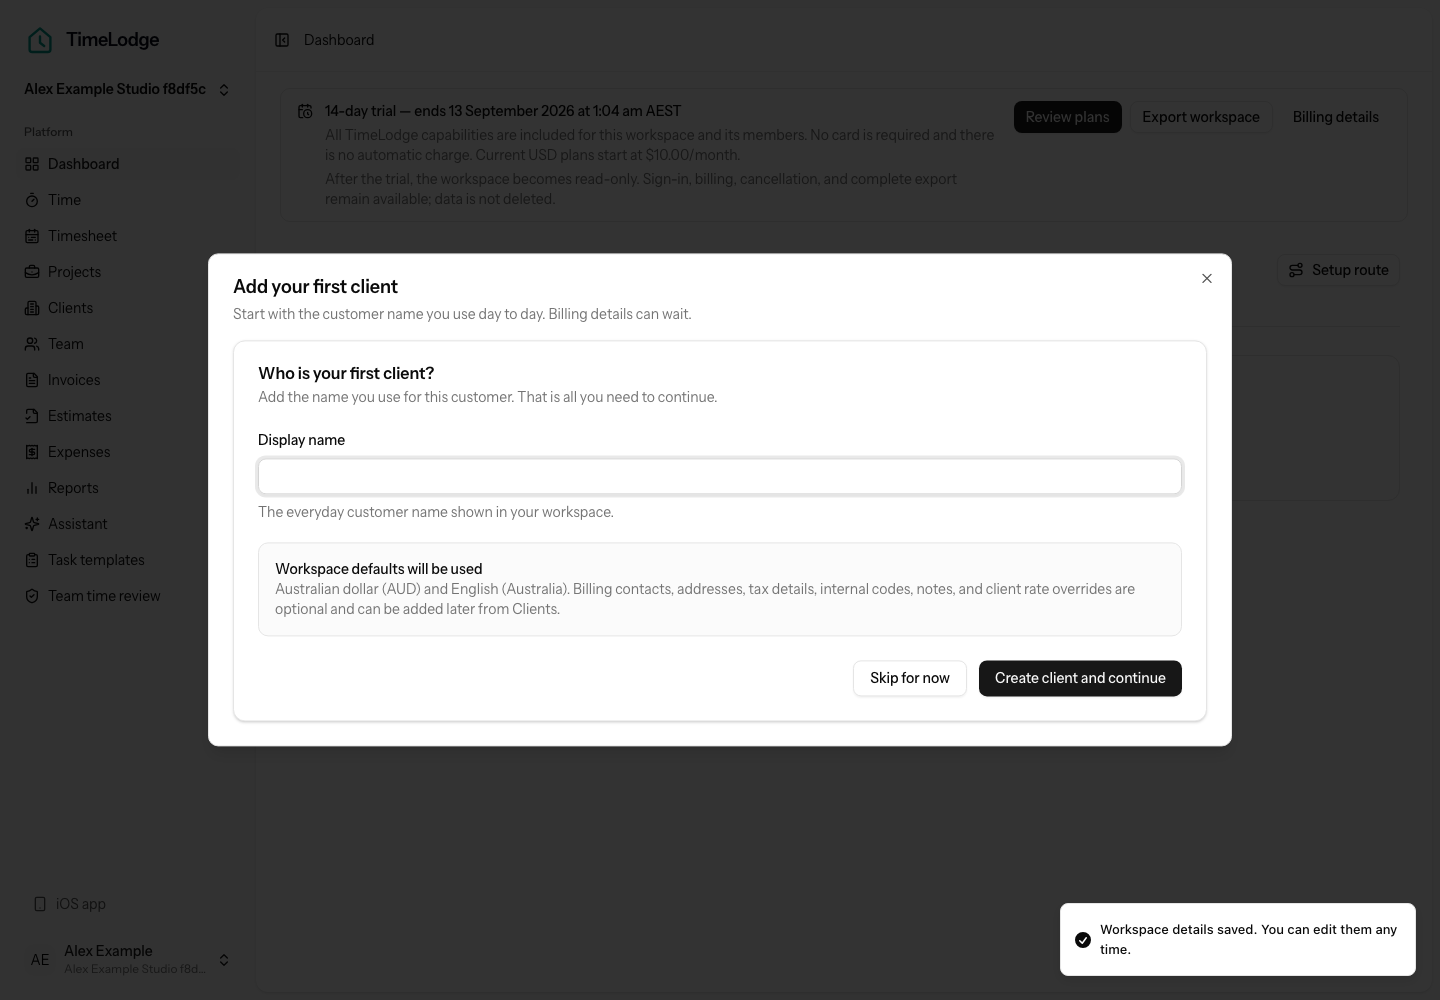
- Confirm that the dashboard opens Add your first client. Your account and workspace are ready; no client exists until you enter Display name and select Create client and continue.
Expected result
You are signed in as the owner of your named workspace. The dashboard opens Add your first client, which is the first useful action in the guided setup route.
Troubleshooting
- TimeLodge says “The email has already been taken.”: Select Log in to continue. Select Forgot password? if you cannot sign in.
- TimeLodge says “We couldn't create your account.”: Review the highlighted fields and try again. Re-enter both password fields because TimeLodge does not keep them after an error.
- Your verification link expired or never arrived: Return to Email verification and select Resend verification email. Use only the newest email.
- You used the wrong email address: On Email verification, select Log out and use another account, then register with the correct address.
- Setup was interrupted: Sign in again and select Setup route from the dashboard. Select Resume saved route when TimeLodge shows it; unsaved workspace edits still need Save and continue.
Related guides
Continue with Add your first client to add the customer for your first piece of work.